


The wine details editor screen has three panes that you can access by pushing on the buttons at the bottom of the screen:
- Name/Region/Prices
- Tasting Notes / Food Pairing
- Domain/ Producer notes and photos
In this article, we describe the fields of the third pane: domain and producer notes and photos.
Domain, producer notes and photos
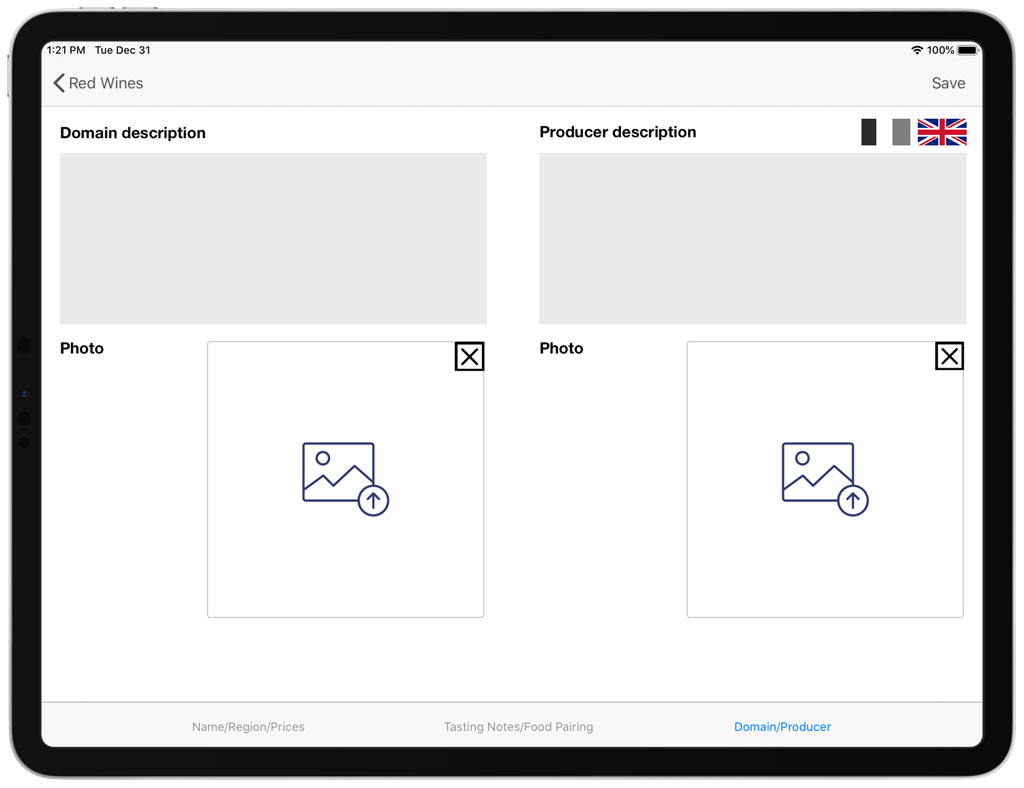
On this screen, you will be able to (from top to bottom, left to right):
- Type the description notes for the wine’s domain in multiple languages (Multi language module required). To switch from one language to another one, use the flags on the right of the screen. The flag of the country/language in color is the currently selected language.
- Type the producer notes of the wine in multiple languages (Multi language module required). Typically, you might want to describe the methods of vinification or storage here. To switch from one language to another one, use the flags on the right of the screen. The flag of the country/language in color is the currently selected language.
- Upload a photo of the domain by touching the landscape+arrow icon. This will open a dialog on your iPad to upload an image. This image should be squared, preferable in format jpg/jpeg and not larger than 3Mb.
- Upload a photo of the producer by touching the landscape+arrow icon. This will open a dialog on your iPad to upload an image. This image should be squared, preferable in format jpg/jpeg and not larger than 3Mb.
In case of you’d like to suppress a photo, use the “X” button next to the image.
Note: if you don’t fill the domain or producer notes field, the button to show the domain text and photo won’t show up for the customers. Remember that the producer and domain notes and photos appear when a customer touch the name or bottle photo of the wine in the wine list. A dialog appear that firstly shows the tasting notes and the food pairing (if you typed them), and buttons on the left to show the domain and producer.
Note 2: on the iPad preferable used for administration, feel free to connect additional cloud storage services such as OneDrive, DropBox. You’ll then be able to upload photos that you have stored and edited with your mac or PC.